Waffle maker buying guide for beginners: Skip the hype
I have a confession to make before we even talk about batter. My first apartment kitchen was an absolute disaster area. I had an accounting degree from the University of Findlay, which meant I could build a beautiful budget spreadsheet, but I could not cook a decent meal to save my life. I owned exactly one cheap skillet, one dented pot, and a plastic spatula that melted the first time it touched hot metal. I burned eggs until they looked like rubber. I turned regular white rice into a sticky gray paste. I even managed to burn canned soup once.
My mom, Linda, was the opposite. She could walk into a kitchen, grab an old beat-up dutch oven, and make a beautiful pot roast without ever opening a cookbook. She never used measuring spoons. Cooking just happened around her.
When my sister Paige started our site, she wanted everything to look beautiful. She kept sending me photos of gorgeous, shiny kitchen appliances on Pinterest. She asked if we should write about them. I responded by sending her long text messages with bullet points about why those specific machines were overpriced, hard to clean, and likely to break after three months. Eventually, she told me to just write it all down for our readers.
That is how this guide came to be. If you are looking for a fancy lifestyle essay about the joy of brunch, you are in the wrong place. But if you want to know which machine will actually make a crisp breakfast without driving you crazy on a Sunday morning, let us look at the facts.
Why Most People Regret Buying a Waffle Maker
Most small kitchen appliances follow a sad, predictable life cycle. You see a beautiful picture online. You imagine yourself making fresh, golden treats every single weekend. You click buy. Then, you use it exactly twice. After that, it gets pushed to the back of a deep cabinet. It stays there next to the old blender until you move or clean out your house.
As an accountant, I hate wasting money. Before I buy a forty-dollar pan, I build a literal comparison sheet. When I started researching this topic, I did what I always do: I skipped the five-star reviews entirely and spent three hours reading the one-star reviews.
The complaints were identical across almost every single brand. People did not hate the waffles. They hated the machines. They talked about batter spilling out of the sides and running down into the electrical dials. They talked about non-stick coatings that started peeling off like sunburned skin after five uses. They talked about machines that took fifteen minutes to heat up, resulting in breakfast taking over an hour for a family of three.
A bad appliance is just a plastic box that takes up your limited counter space. To buy a good one, you have to look past the marketing claims on the box. You have to look at the mechanical reality of how the machine is put together.
The Battle of the Grid Types: American vs. Belgian
The first choice you have to make seems simple, but it changes everything about how your food will taste. You need to choose between a classic American style or a deep Belgian style. This is not just about looks. It alters the texture of your breakfast.
Classic American Models
These machines make thin, flat rounds or squares. The grid pattern inside is small and dense. Because the plates are close together, the batter cooks all the way through very quickly.
- The Texture: Crisp on the outside, dense and chewy on the inside.
- The Storage Factor: These machines are usually small and flat. You can slide them into a drawer or stand them up sideways in a narrow cabinet.
- The Budget Factor: They tend to use less metal and simpler heating elements, which makes them easier on your wallet.
Belgian Models
These machines have much deeper pockets. The metal ridges inside are tall.
- The Texture: Thick, light, and full of air. The outside gets very crunchy while the inside stays soft like a cake.
- The Science of Lightness: Traditional Belgian recipes use whipped egg whites or yeast to make the batter rise. When that wet batter hits the deep, hot grids, it expands rapidly and creates pockets of steam.
- The Storage Factor: These are bulky. They take up a lot of room, and they rarely fit into a standard kitchen drawer.
If you want a quick breakfast that reminds you of the frozen kind you pop in a toaster (but tastes much better), go with a classic thin model. If you want a thick, fluffy breakfast that can hold a lot of syrup or butter in deep pockets, choose a Belgian model.
[YOUTUBE EMBED: “How to Make the Best Waffles” — Serious Eats — Shows the impact of steam release on waffle crispness]
The Chemistry of the Coating: PTFE vs. Ceramic vs. Cast Iron
The plates inside the machine are where the actual work happens. If your food sticks to the metal, your breakfast is ruined, and your morning is spent scrubbing tiny squares with an old toothbrush. There are three main materials used today.
Traditional PTFE Coatings
Most modern machines use a synthetic chemical called Polytetrafluoroethylene (PTFE), which most people know as Teflon. It is incredibly slick. Waffles slide out of a good PTFE machine without any effort at all.
However, you have to treat this material gently. If you touch it with a metal fork or a knife, you will scratch it. Once a non-stick coating is scratched, it will start to flake off into your food. Before I bought any non-stick appliance for my kitchen, I spent an evening reading the FDA’s public safety guidelines on food-contact materials and non-stick chemistry to ensure I understood the temperature limits. The data shows that PTFE is perfectly safe for home use as long as you do not overheat it. Since electric machines have built-in thermostats that stay well below dangerous temperatures, you do not have to worry about safety. You just have to worry about scratches.
Ceramic Coatings
In the last few years, ceramic has become very popular. Marketing departments love to use words like “green” and “natural” to sell these. Ceramic is actually a metal plate coated in a layer of fire-hardened clay.
The good news is that ceramic does not use traditional non-stick chemicals. The bad news, which I found after looking through hundreds of long-term user logs, is that ceramic loses its non-stick power much faster than PTFE. It might work perfectly for the first six months, but eventually, microscopic pores open up in the clay, and your food will start to stick. To understand how these materials are tested for durability, you can read about how independent organizations set product certification standards for commercial kitchen gear. Commercial kitchens almost never use ceramic because it simply does not last under heavy daily use.
Cast Iron
This is the old-school option. My mom’s favorite skillet was a heavy piece of cast iron that she used for everything. You can buy cast iron plates that sit directly on top of your stovetop gas burner.
- The Pros: It is completely indestructible. You can use a metal fork, drop it on the floor, or leave it to your grandkids. It holds heat incredibly well, which gives you the absolute crispiest crust possible.
- The Cons: It is heavy, it requires manual heat management on your stove, and you have to maintain the dark layer of baked-on oil called seasoning. If you want a quick, automated breakfast before work, this is not the choice for you.
Design Flaws That Will Drive You Insane
When you look at a product listing online, every machine looks perfect. It is clean, shiny, and surrounded by fresh strawberries. But as an accountant, I am trained to look for failure modes. Here are the mechanical flaws that show up after a month of real-world use.
The Shallow Overflow Moat
When you pour batter onto a hot plate and close the lid, that batter expands. If you pour even one tablespoon too much, it has to go somewhere. Cheap machines have a flat edge. The excess wet batter runs right out of the side, down the front of the machine, and wraps around the hot electrical cord.
A well-designed machine has a deep channel or moat running all the way around the outside of the cooking grid. This moat catches the excess batter and cooks it into a neat little stick that you can easily lift out.
[YOUTUBE EMBED: “Waffle Maker Review & Equipment Testing” — America’s Test Kitchen — Breaks down how different grid designs spill batter and cause cleanup issues]
Non-Removable Plates with Deep Grids
If your machine does not have plates that pop out, you have to clean the entire appliance as one solid unit. This means you cannot rinse it under the faucet or put it in the sink. If you accidentally burn a batch of high-sugar batter (like if you add chocolate chips or pearl sugar), you will be stuck wiping out individual squares with a damp rag for half an hour.
Loose Latches and Weak Hinges
A classic thin model needs a tight latch to press the batter flat. A Belgian model needs a heavy, free-moving hinge so the batter can push the lid up naturally as it expands. If the hinge is made of cheap plastic instead of stamped metal, it will crack under the pressure of the rising steam. I always look at user photos in online marketplaces to see exactly where the plastic joints tend to fail after a few months of heat exposure.
The Truth About Flip Models vs. Stationary Models
If you have ever stayed at a mid-range hotel with a free breakfast bar, you have probably used a rotating machine. You pour the liquid into the grid, close the lid, and flip the whole thing upside down.
Why Flipping Works (The Physics)
When you pour batter into a standard, stationary machine, gravity pulls the liquid down into the bottom plate. The bottom side starts cooking immediately. The top of the batter expands upward, trying to touch the top plate. If your batter is a little thin, or if you did not pour enough, it will never make full contact with the top lid. This leaves you with a waffle that is dark brown and crisp on the bottom, but pale and soft on the top.
A rotating machine solves this by using gravity. The moment you flip the iron over, the liquid batter flows down into what was the top plate. Both sides get an equal coating of wet batter immediately. This creates a perfectly even, symmetrical shape with identical crispness on both sides.
Do You Need One at Home?
The short answer is no, unless you are very picky about absolute symmetry. Rotating machines require a large plastic or metal base to hold the spinning joints. This means they take up twice as much vertical space in your cabinets. If you have a small apartment kitchen like mine, that extra bulk is a massive downside. You can get an equally crisp breakfast from a stationary machine if the heating elements are spaced correctly and you use a thick batter.
Features That Are Worth Your Cash (And What to Skip)
Manufacturers love to add extra features so they can charge you an extra twenty or thirty dollars. Let us break down which ones actually matter to your wallet and your morning routine.
Worth It: Precise Browning Dials
A simple light that turns from red to green only tells you that the machine has reached its target temperature. It does not tell you how cooked your food is. A machine with a numbered dial allows you to control the actual power flowing to the heating coils. If you like your breakfast soft and light, you can turn it down to two. If you want it dark and crunchy enough to hold up under a mountain of syrup, you can crank it to five. This is an essential feature if you are cooking for a family with different preferences.
Skip It: Built-In Digital Timers and Sound Clocks
Some high-end machines feature digital screens that count down the seconds and play a loud melody when your food is done. This is an unnecessary feature that adds more sensitive electronics to an appliance that gets incredibly hot. More electronics mean more potential points of failure over time. To avoid these issues, you can check Consumer Reports’ general appliance testing methodologies to see how heat cycles break down digital components. Use the kitchen timer on your stove or the stopwatch on your phone instead. Save your money for better build quality.
Worth It: Auditory Readiness Indicators
While you do not need a fancy digital screen, a simple mechanical beep or loud click is incredibly useful. When you are busy frying bacon or brewing coffee in your french press, you will not notice a tiny green indicator light turning on across the room. A loud beep lets you know exactly when to pull your food out before it burns.
Specific Models for Specific Buyers
Instead of giving you a generic list of the ten best products on the market, let us look at real scenarios. Every machine mentioned below has earned its spot based on a deep dive into its mechanical design and long-term user durability data.
The Best No-Nonsense Budget Choice: Cuisinart Classic Round (WMR-CA)
If you just want simple, thin, American-style rounds without spending a fortune, this is the machine to buy. It is a tiny brushed stainless steel unit that fits easily into any small drawer.
- The Good: It features a solid five-setting browning dial and heats up very quickly because the plates are thin. Waffles come out crisp and even.
- The Bad: The plates are completely non-removable. If you make a mess, you have to clean it in place. There is no deep overflow moat, so you must be careful not to overfill it. It is perfect for a single person or a couple living in a small apartment.
The Best Easy-Clean Belgian Choice: Hamilton Beach Flip Belgian (26031)
If you want those thick, airy pockets but are terrified of the messy cleanup, this rotating model is a smart option.
- The Good: The absolute best feature here is that the non-stick plates pop completely out of the machine with the press of a single button. You can wash them by hand in warm soapy water without risking any water damage to the electrical base. It also includes a removable, dishwasher-safe drip tray that sits under the spinning grids to catch any accidental spills.
- The Bad: It is bulky. The folding handle helps a bit, but it still requires a dedicated spot in a deep cabinet.
The Premium Accounting Pick: Breville Smart Waffle Pro
This is an expensive machine, but the engineering justification is clear if you make breakfast for a crowd every single week.
- The Good: It uses heavy-cast aluminum plates with heating elements embedded directly into the metal rather than floating loosely underneath. This completely eliminates cold spots, resulting in perfectly even browning across all four squares. It features a massive wrap-around moat that catches overflowing batter and cooks it completely into crisp, edible pieces.
- The Bad: It costs more than double what a standard machine costs, and it weighs a ton. It is only worth the investment if you use it constantly and have a large kitchen with plenty of counter space.
How to Keep Your Machine From Becoming a Sticky Brick
Once you buy a machine, you need to care for it properly. Most people ruin their non-stick coatings within the first year because they follow bad advice they see online.
Never Use Commercial Aerosol Cooking Sprays
This is the number one reason why non-stick plates fail. People buy a bottle of standard aerosol cooking spray from the grocery store and coat their machine before every batch. These commercial sprays contain a plant-based chemical called lecithin. When lecithin is subjected to high heat, it undergoes a chemical change and polymerizes into a sticky, gummy brown residue.
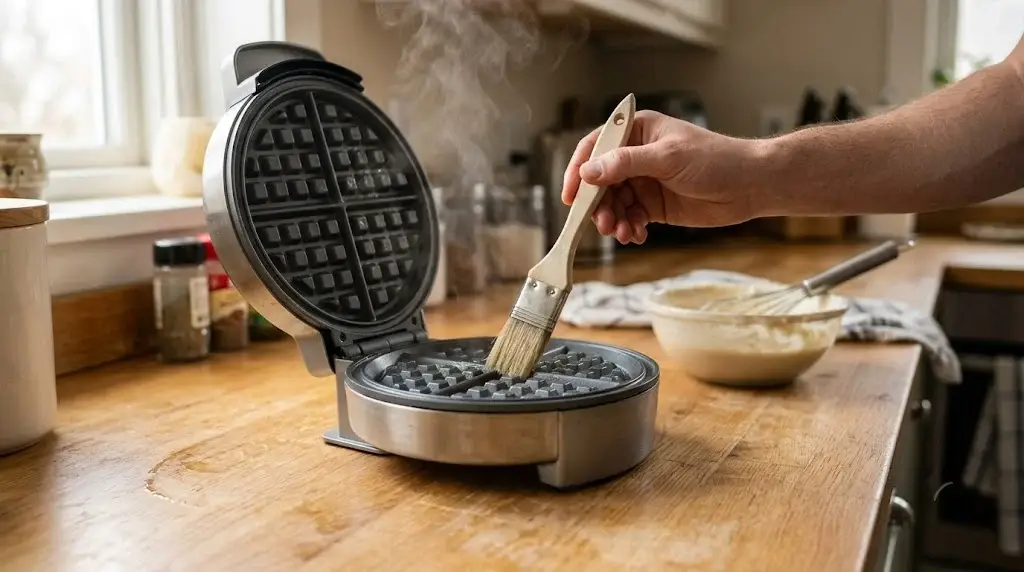
This residue bonds directly to the non-stick coating. You cannot wipe it off with a simple rag. Once this layer forms, your food will start sticking to the plates every single time. Instead of using a chemical spray, use a pastry brush to apply a very thin layer of regular liquid vegetable oil or melted butter directly to the grids before you pour your first scoop of batter.
The Safe Cleaning Protocol
To ensure your machine lasts for years without losing its slick surface, you must wash it carefully. Never use abrasive green scrub pads, harsh steel wool, or baking soda paste on a PTFE surface. These rough materials create micro-scratches that ruin the non-stick bond.
Instead, use the gentle steam cleaning method. When you are done cooking, unplug the machine and let it cool down slightly until it is warm but not dangerously hot. Take two paper towels, dampen them with water (make sure they are not dripping wet), and place them flat across the bottom grid. Close the lid gently. The residual heat from the metal plates will turn the moisture in the towels into steam. This steam will naturally loosen any hardened batter or crusty sugar within two minutes. Open the lid, remove the wet paper towels, and use a dry microfiber cloth to wipe the grids clean. For the tight corners near the hinges, use a soft nylon-bristle pastry brush to sweep out any remaining crumbs.
Beginner Waffle FAQ
Can I use regular pancake mix in a waffle maker?
You can, but you will be disappointed by the texture if you do not alter the recipe. Pancake batter is designed to rise upward on a flat griddle, creating a thick, soft, cake-like interior. Waffle batter requires a significantly higher amount of fat (either vegetable oil or melted butter) and an extra egg yolk. The extra fat acts as an internal releasing agent that prevents sticking, while the high fat content cooks against the hot metal plates to create a crisp, crunchy exterior crust. If you pour standard, unaltered pancake mix into a machine, your breakfast will turn out soft, pale, and soggy.
What should I do if my waffle gets stuck and rips in half?
First, do not panic, and never grab a metal knife or fork to pry it out. If you scrape the metal plates, you will permanently ruin the non-stick coating. Unplug the machine immediately to stop the heating elements. Let the appliance cool down completely. As the stuck batter cools, the starch structure will naturally firm up and shrink slightly away from the metal. Once the machine is cold, use a pair of silicone-tipped kitchen tongs or a flexible wooden spatula to gently lift the pieces out of the grid channels.
How do I know exactly when my waffle is completely done?
Ignore the green indicator light on the lid. The absolute best way to check for readiness is to watch the steam rising from the sides of the machine. When you first pour wet batter onto the hot plates, a thick plume of white steam will pour out of the seams. This steam is the moisture escaping from the raw batter as it cooks. As the interior finishes cooking and the crust begins to form, the steam production will drop off significantly. When the visible steam stops rising entirely, your breakfast is fully cooked and ready to be removed.
Why does my first waffle always turn out terrible?
This is a very common issue that has to do with thermal regulation. When a machine sits idle, the internal thermostat registers that it has reached the correct cooking temperature and turns the indicator light green. However, the heavy metal plates inside may not have absorbed that heat completely and evenly all the way to the outer edges. The first scoop of cold batter drops the plate temperature rapidly, resulting in an unevenly cooked, pale breakfast. To fix this, always let your machine preheat for an extra three to five minutes after the green readiness light turns on to ensure the metal grids are thoroughly saturated with heat.
How should I store my machine when I am not using it?
Always let the appliance cool down completely to room temperature before putting it away. If you close the lid tightly while the plates are still warm, you will trap residual humidity inside the dark cooking chamber. This trapped moisture can cause premature corrosion of the heating elements or mold growth along the internal rubber gaskets. If your model has a lock or latch on the handle, do not engage it during storage. Leaving the latch locked puts constant tension on the plastic hinges, which can cause them to crack over time. Store the machine upright with the plates slightly unlatched to allow for natural airflow.